We do Tech News Right
Guest Post
Explore a range of viewpoints on the latest tech trends with our Guest Posts.

/
Read Full Article: Need a New Phone but on Benefits with Bad Credit?When it comes to the interest rates, the loan amount may be expensive. But you can minimise the cost by…
/
Read Full Article: How Mobile Apps Are Making Product Safety Alerts TrackLearn how mobile apps help users track product safety alerts, product recalls, food recall alerts, vehicle recalls, and consumer product…
/
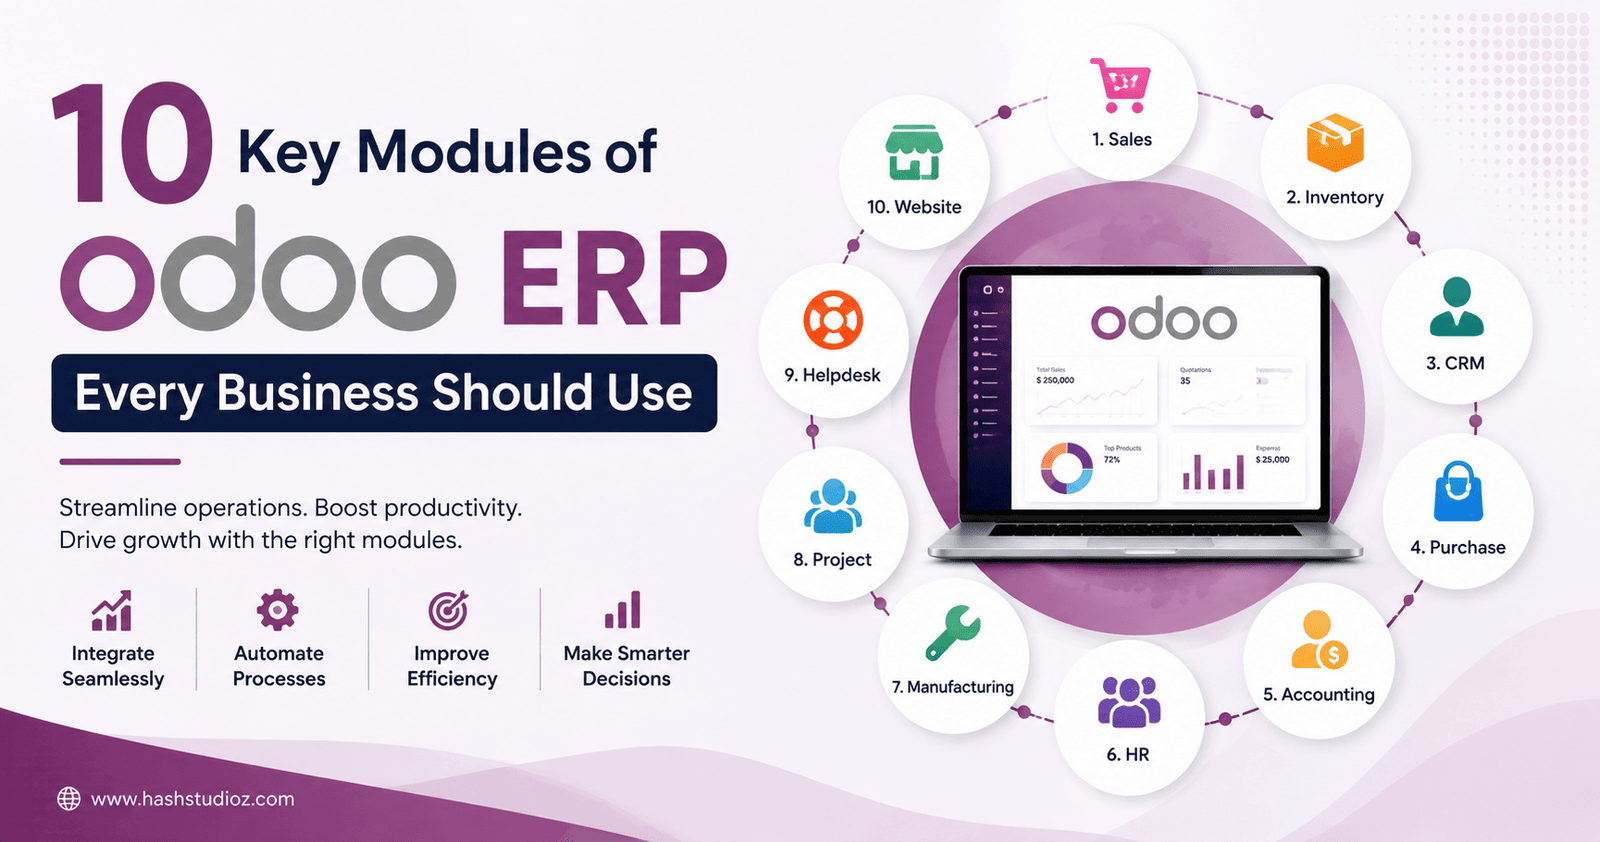
Read Full Article: 10 Key Modules of Odoo ERP Every Business Should UseThis article explains how a phased Odoo ERP implementation can replace disconnected business tools with a unified system. It covers…
/
Read Full Article: SEO Agency London: What UK Businesses Should Look ForIf you are looking for an SEO Agency London businesses can trust, you do not just need someone who knows…
/
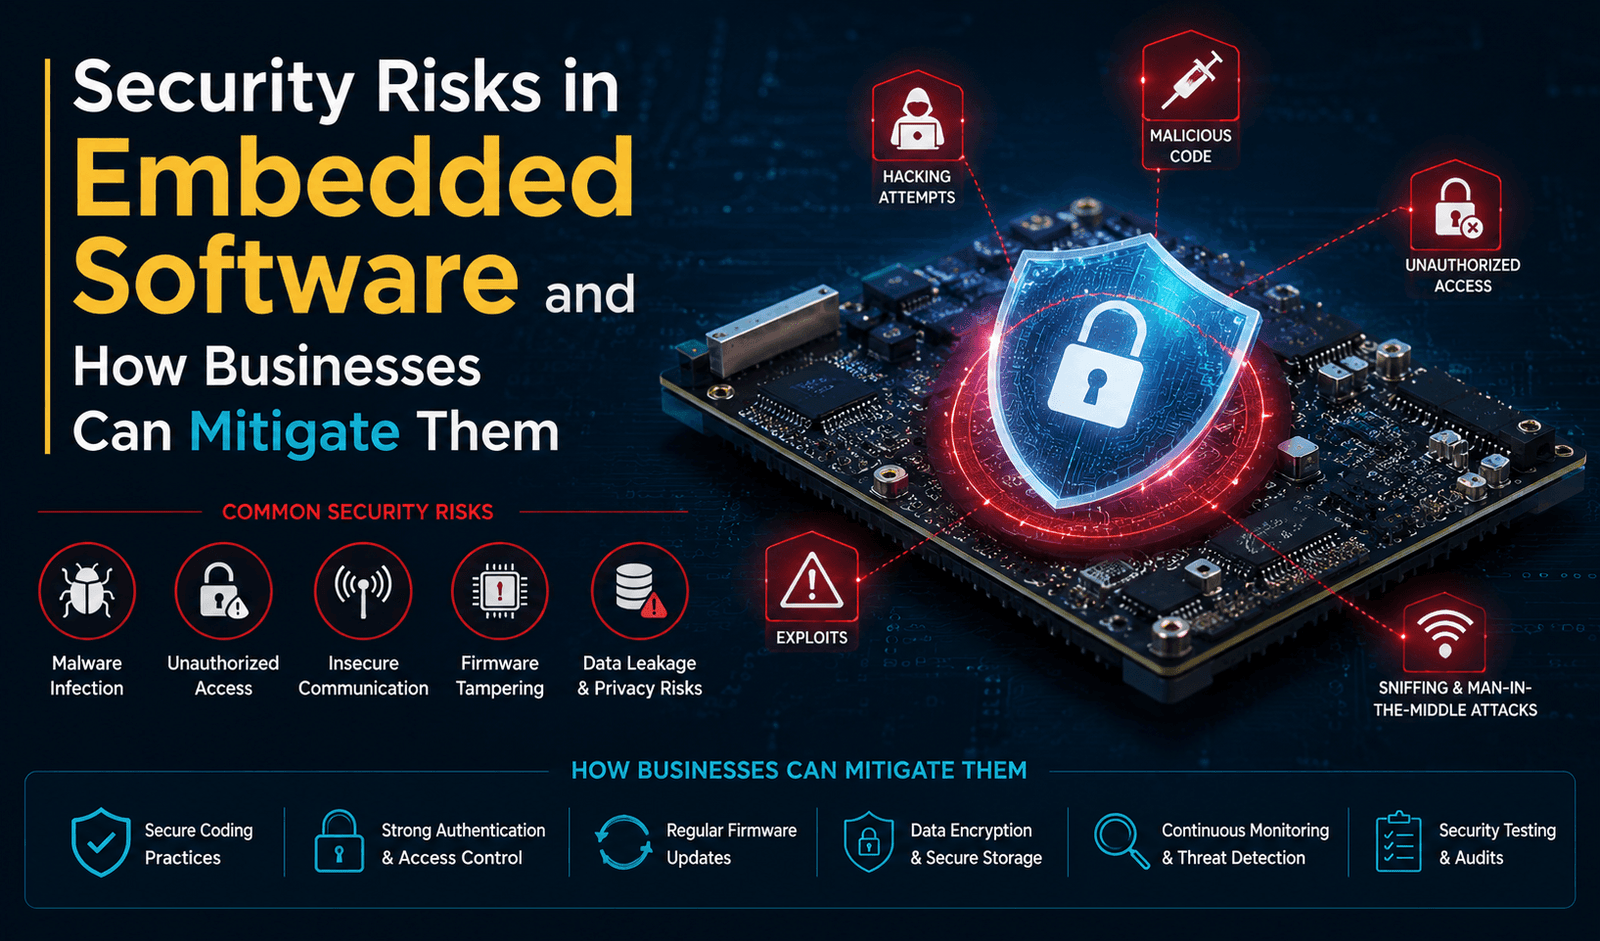
Read Full Article: Embedded Software Security Risks and SolutionsLearn about Embedded Software Security Risks and how businesses can reduce threats with secure coding, encryption, and regular updates.
/
Read Full Article: How to Hire a Dedicated Software Development Team in 2026Hire a dedicated software development team to build scalable MVPs faster. Learn benefits, hiring tips, and best practices for success.
/
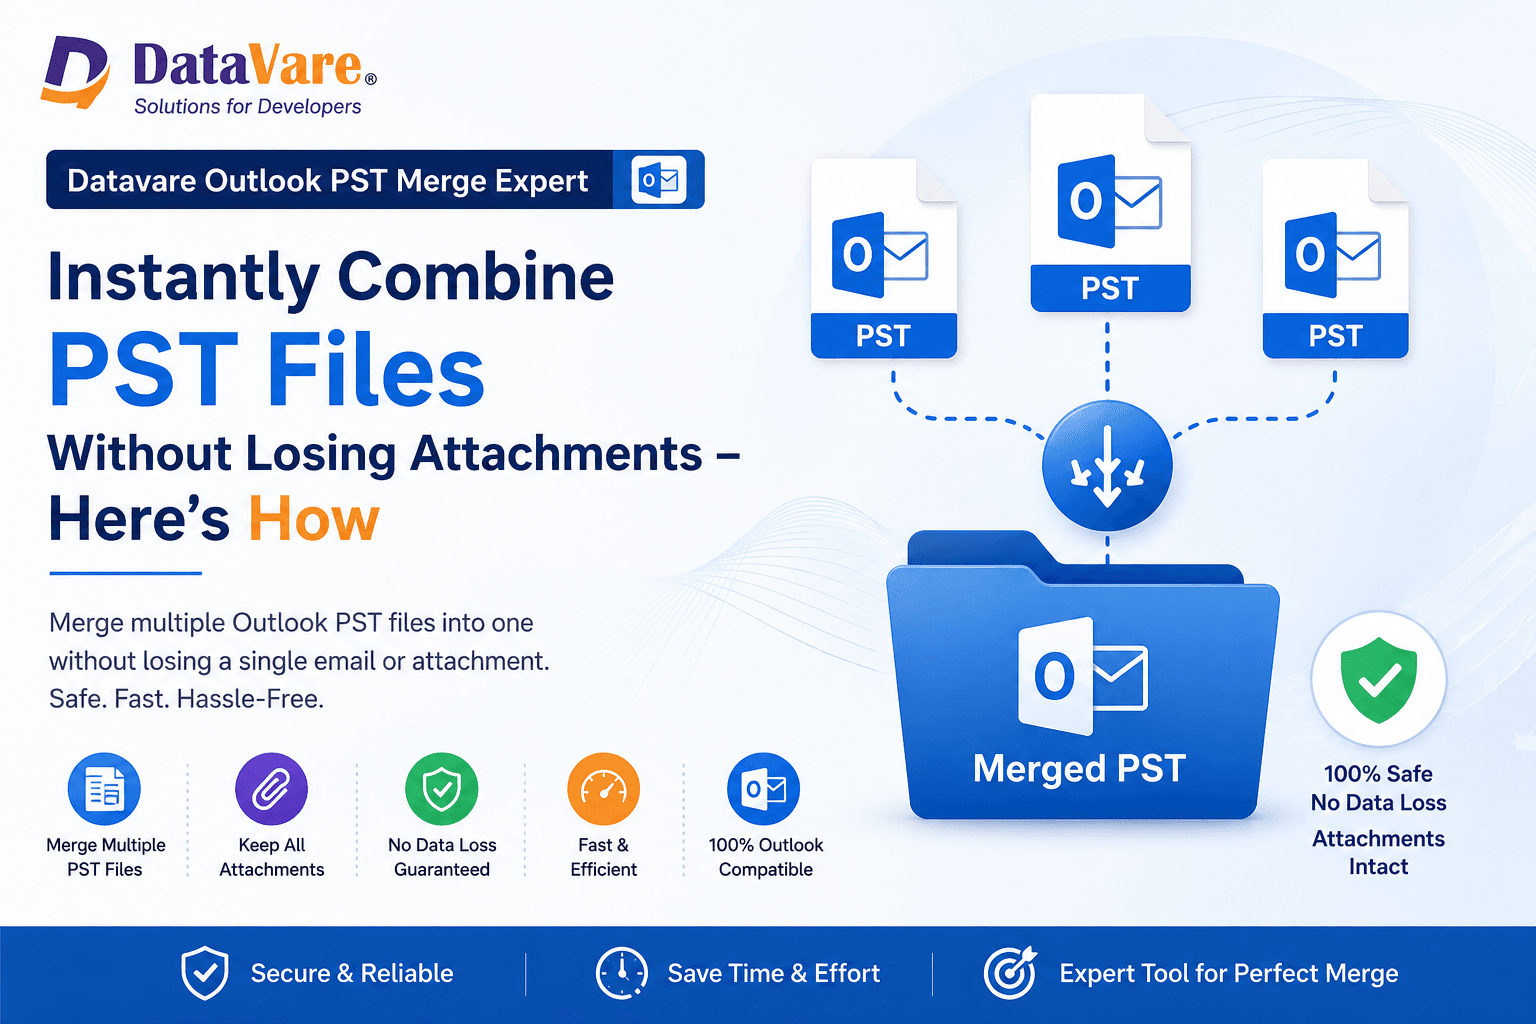
Read Full Article: Instantly Combine PST Files Without Losing AttachmentsMerge multiple Outlook PST files instantly without losing attachments using the DataVare Outlook PST Merge Expert Tool. Safely combine PST…
/
Read Full Article: Reasons why your backlinks are getting listed as spamshat is an effective link-building strategy? It has always been a difficult question to answer, as many digital marketers believe that submitting guest blogs…
/
Read Full Article: Digital Age Parenting: A Smarter Approach to Screen Time and Family BalanceTechnology is now part of almost every family’s daily routine. Children use screens for learning, entertainment, games, videos, and sometimes…
/
Read Full Article: Lessons in Data Visualization and Agile WorkflowsThis lesson came to life through two main pillars: the power of Data Visualization and the flexibility of Agile Workflows.
/
Read Full Article: The Rise of Apps Like Playris in the Big-Screen Music ExperienceMusic streaming has long been shaped around phones, laptops, and headphones, but listening habits are changing. More people are using…
/
Read Full Article: How Set Infinite Combines Task Management, Scheduling, and Habit Tracking in One SystemManaging work and personal responsibilities often means using different apps for tasks, calendars, routines, and reminders. That setup can feel…